Sunday, 5 July 2015

A House Divided... ... can make for a good game!

July 4, 2015 --- At the request of a few of the historical players at the Hamilton Road Games Group, an American Civil War game using our "home-brewed" variant of Iron Ivan's This Very Ground was set up. Bear (in his persona of Col. Beauregard Clemens Bayer) and Wayne (who had played Iron Ivan games before, just not this one) ran the Confederate side while Brian and I ran the Union troops. Andy set up the terrain and took over on the Rebel side when Wayne had to leave by mid-afternoon.
Each commander had three 12 man squads and a 12-pounder cannon (6 crew). The Federals also had a small (6 man) section of sharpshooters. In our variant, the usual personal weapon is the rifled musket with a range of 25", while the sharpshooters carried a sharpshooter's rifle with a 36" range. The cannons range was up to 60" so just about the entire board was in range. We chose the 12-pounder Napoleon cannon because it was the most common. Smaller calibre cannon were found but not often.

(Andy and I took all the photos.)

The game table at the onset of the whole thing. Anything 2 inches outside the rail fences was considered light woods.
Beauregard contemplates his strategy.

Wayne's troops line up to enter.

Good beans!
This is a piece of cloth Andy found somewhere which really looks good as a cultivate field for a game like this.
If you turn it over, it's a dark brown or black with some green lines, so it looks plowed and early in the season.

Brian and I won the initiative roll and moved first. I pushed on section in skirmish order into the woods on my right flank while I brought up the two other platoons in loose order. My gun stayed where it was, behind the rail fence and my sharpshooters moved up along the hedge line in skirmish order. Brian sent two sections into the woods and brought one up through the pig-sty to a stone wall. His gun faced Bear's along the outside of the fenced-in compound. Wayne and Bear pretty much mirrored our deployment and first move. No one was in musket range right off, although my cannon did some damage to one of Wayne's sections which stayed back at the rail fence at the start line. 

Both sides tried to come to grips as soon as possible. Wayne (and later, Andy) and I exchanged a lot of musket fire. Bear quickly brought up two sections to occupy the rail fence in the middle of the farmstead and the farm house. A third section came to the corner of the rail fence to oppose Brian's skirmishers in the woods. In the mean time, Brian's cannon took out four of Bear's gunners and soon after Bear's gun silenced the Union gun by wiping out the crew. Brian's skirmishers finally cut Bear's artillery crew down to one man - who could still fire the gun, but had a serious problem loading it and a bigger problem turning it. The Confederate section along the rail fence facing the woods went prone (an variant move for us.) which makes them harder to hit but really vulnerable in combat. Basically their opponent gets a free hit at the prone troops who could fire but can't realistically fight hand-to-hand from a prone position.
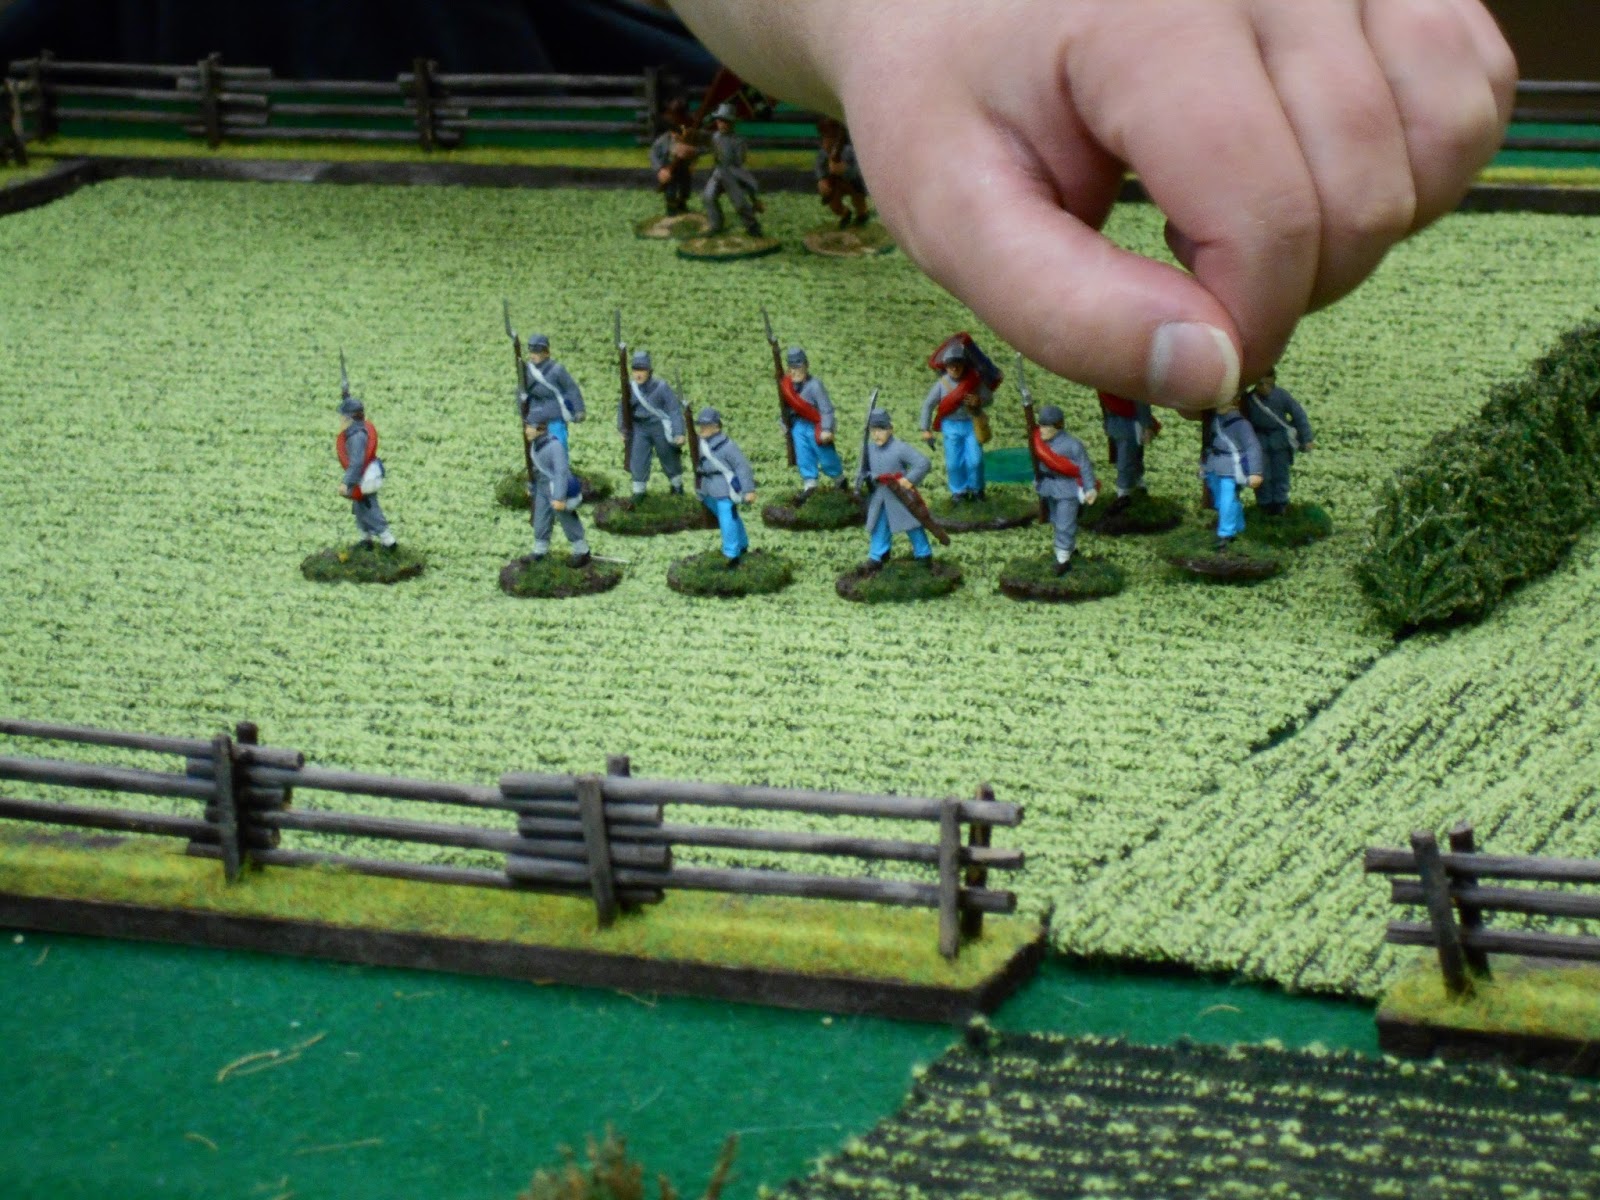
Beauregard positions his leading section in the bean field.
Each section was 10 muskets, one officer, and one drummer or standard bearer.
The musician/standard permits a quick reform of the unit after a voluntary retreat or "ski-daddle."

Zouaves of the 146th New York cross the pig sty to take position on the stone wall.
Their lead is the sergeant seen closest to the camera. The green bingo chip means the unit has been activated that turn.

Confederate standards making a quick advance... too quick for my camera to catch.

Bear's Virginians take cover at the rail fence.

Brian measures a movement as his skirmishers advance.

The 146th take the wall.
The yellow chips indicate that the unit has fired a "half volley." It will take two turns of doing nothing to be fully reloaded.
(Perry plastics)
On my side of the table, my cannon did pretty good service keeping the Rebs' heads down. Wayne's/Andy's eventually took out two of my six crewmen, the loss of whom didn't slow my rate of fire. My lead unit advanced to the rail fence in the centre of the field where they exchanged fire with the Confederate troops across the field. Their shooting was better and my unit was eventually reduced to the officer, the drummer, and one musketman. My second section shifted right and moved over the rail fence and into the woods to join my right-most section in opposing the gray-clad skirmishers there. In the centre, my squad of sharpshooters picked off one or two Confederates but were eventually wiped out as well.

My two centre sections advance. The rear-most continued to shift to its right until it moved over the fence.
The advance at ground level.

My troops have come over the fence and the Confederate skirmishers await their next move.

The sharpshooters skirmish across the field and hedge.
(Perry metals)

Wayne/Andy's troops move along the edge of the woods.

"Them's are the fellas what shot down the sharpshooter, they are!"

My cannon in the process of reloading.

Andy took control of the Confederate left when Wayne had to go, and he began a slow pull back. He decimated my one section but pulled his two sections in the woods back. His gun had taken casualties from some counter-battery fire but was still in action. The question soon came up: do we want to continue? Andy felt that it was time to pull back and leave the field to the Union, although the Union had lost a cannon, the sharpshooters, and the majority of one of my sections. I more or less controlled the centre of the one side of the farm, while Bear controlled the other side with troops in the farmhouse. Brian considered charging Bear's prone troops which would mean negotiating a rail fence while charging. He'd get a free hack at Bear's prone unit, but getting there was the problem. Then would come the troops in the farmhouse. The section of the 146th at the stone wall was more than one charge move away, so they'd most likely sustain heavy casualties before hitting the untouched unit in the farm house. 

That's where we left it. Probably a winning draw for the Union since it was time for the Southerners to withdraw and fight another day. We cleaned up and discussed next week's event (reenacting), politics, and other innocuous treason.

 
A view of the action in the woods from another perspective.

... and from closer to the ground.

In a final desperate attempt to defeat me and to confuse me,
Andy deployed the elite Alabama Ent Brigade.

Meanwhile at home, some of the beasties who share our yard help themselves to some extra bird seed.
On the way home from church today, we stopped at a hardware store for a tape measure.
I saw this beauty in the parking lot and brought it to Beth's attention. Now Beth loves Italian exotic cars,
so we had to take a few photos. She said he hadn't DRIVEN one of these in 35 years!
That's right; She said DRIVEN. My wife has had such adventures!
A Dethomaso Pantera ...so choice.
Next week, a "time-line" reenacting event. I'm looking forward to this.

Wednesday, 1 July 2015

The SAGA continues.

The "historical arm" of the Hamilton Road Games Group held a triple-table SAGA event last Saturday. Four folding tables were put out and three separate games were held at the same time. I ended up across the table from Steven, Andy's son, who shows up at the Group when his work schedule allows. He fielded Jomsvikings while I ran out my Irish to see how they'd work again. I forgot my war-dogs, which the Irish are allowed to field as part of their force, so I fielded my usual 2 units each of kern (levy), Bonnachts (warriors), and Fianna (elites) as well as my warlord. Steven's Jomsvikings are not able to field any levy so all he had were warriors and Hirdmen. The Jomsvikings have a thing called "wrath" which can build up under certain circumstances which permit that crowd to move the opponent's units or remove figures from enemy units. I wasn't sure what "wrath" did but I tried to avoid it as much as possible.

The Jomsvikings of Steven Andreuson advance. There was a good bit of terrain on the board... as the Irish like it!

Warriors in larger units and hirdmen/huscarls in smaller.

The other view with my Gaels and the obligatory bog.
Derek, to the right, checks his viking battle board. He was opposed by Bear with more Jomsvikings.

As it was Steven Andreuson (to Viking-ize him) allowed me to move forward a lot and hung back on his end of the board. I know the Irish are not much armoured but they all carry javelins so I tried to close to some sort of throwing range quickly. Steven used one of his battle board abilities and did damage to one of my kern outfits. I did everything I could to keep Steven's warband from building wrath, which caused some unfortunate trade-offs for me but it kept some of the Jomsviking special abilities under wraps.

At one point, I discovered an Irish battle board special ability: if an opponent's unit is within 4 inches of ANY "unlevel" ground (hills, trees, bogs, industrial waste, etc.), the Irish player can shoot one shot at that unit with unseen people in the terrain. This simulates hidden forces taking pot-shots at the enemies with stones and the like. (the rules add "potatoes" but I'm too much of a Dailey to acknowledge that slur!) Because of this, Steven spent the game avoiding terrain and furiously measuring. I did end up hitting a unit of warriors with my kern's javelins and doing unexpected damage to them. I really think that there are no push-overs among the factions in this game. Steven did use one of his battle board abilities to immobilise my warlord who appeared to have "sat out" most of the game.

The kern advance on the left flank. (Old Glory 25's)

My warlord takes a long breather. (Another Old Glory 25's from the Saxon raider bag.)

It almost appeared that Steven was forming a shield wall. I found out later what was going on when he sprung his trap.

Bondi and the Warlord fight my kern and drive them back.

The game see-sawed back and forth with me avoiding stirring up Jomsviking wrath and Steven avoiding all uneven terrain. Eventually after losing a unit of Kern, I advanced close to the Jomsviking battle line. Then Steven unleashed his secret weapon; his battle board allows him to move some of my units and he did so, pushing back troops and pulling the warlord forward. He then dry-gulched my leader and killed him - the object of the scenario.

I did lose the game, but all I can say is that the "boyos" gave him a run for his money.

Derek and Bear battled it out with vikings and Jomsvikings respectively. Andy and Kevin opposed each other with Normans and Anglo-Saxons, I believe. Later, Andy taught Wayne the game and Kevin took the Normans to fight the Anglo-Saxons again. Wayne had never played the game before, but I think he finished the game a fan.

A photo of some of my Bonnachts playing "king of the hill."

My Kern had been thrown back with some losses.
The bingo chip or the shields on the ground indicate a "fatigue" on the unit.

the Jomsvikings gather in tight formation as they avoid all rough terrain.
Can't you just hear it? "Come o'er here, ye blatherin' skilipeen!"

We're all getting fewer, but the Kern stood some of their ground.

The Jomsviking warlord, Swen Swensonson, looking belligerent.

I still say it looks like a shield-wall.

The scene just before Steven moved both of my Fianna back and pulled my warlord forward.

The warlord and some of his warriors holding the flank.
For next week, we decided to play American Civil War skirmish gaming in 25mm... since it is the Fourth of July. I've got to finish an artillery crew for this game.

From the Jomsviking perspective, the Kern taunt the Bondi unmercifully.

My warlord, Sean Laim OgDaileigh, moves forward and builds fatigue.

On the far end of the table, Wayne's Anglo-Saxons face off with Kevin's Normans.

Kevin's knights fight with the Select Fyrd.

The same thing - just a little further.

Sunday, 21 June 2015

Our Small Tribute to Waterloo... or Waffles all around!

Last Saturday (yesterday), the Hamilton Road Games Group of London, ON decided to set up a small-ish game to commemorate the battle of Waterloo on its 200th anniversary. Just something to engage in the almost world-wide remembrance of Napoleon's last Huzzah, as it were. We used Arty Conliffe's Shako rules for Napoleonic battles and decided to do a "bath-tub" version. Well, it was more of a toilet bowl version since I didn't spend enough time organising it and setting parameters. However, the players appeared to enjoy the game although both Kevin and Andy might be buying new dice, since the ones they used were "toxic" and probably should be sealed in concrete and buried in a controlled landfill somewhere.

A "Bath-tub" game takes a larger campaign or huge battle and telescopes it down to a workable, playable level. This was not a true bath-tubbed game, but I don't show any other way to describe it. Martin, Andy, and Beth handled the Imperial French side. Martin fielded his Imperial Guard units for the first time ever in his attempt to honour his namesake, Marshal Lefebvre, as well as a division of French regulars. Andy commanded French troops while Beth commanded her Italians, who were leased for the day to the Empire and were issued French identity cards for the duration of the battle. On the other side, Kevin commanded two divisions of British troops, Bear commanded a division of Prussians, and I bravely led the Dutch-Belgian contingent, using my War of 1812 US troops and some Allied cavalry from Belgium and Hanover.


(Photos courtesy of Beth, Martin, Andy, and myself.)


A big view of the table during the set-up

The Dutch-Belgian contingent. No, that's not a Maryland flag you see; you're drunk again.

Martin and Andy consider a move or a cannon shot.

Beth and I in the middle of getting out the figures.
The British and Dutch-Belgians were set on the top of the ridge along the west side of the board (west in real directions) while the Prussians would enter on the north edge once Bear arrived or on the third turn if he was delayed. As it was, he got in early. The objective was for the Allies to hold the ridge and deny the French the road to Brussels. For the French, the objective was to push the Allies off the ridge or punch a hole in the line large enough for the columns to push through and gorge themselves on Belgian waffles in the national capitol.

As the game began, the Allies stuck to their ridge and the Prussians marched in. Beth turned to engage Bear and his Prussians and the battle flared up there. Martin and Andy began their advance toward the ridge and used their artillery to soften up the defenders, although the dice for artillery did not cooperate much.


Kevin attempts to entice the French forward with a portion of his sandwich.

Kevin's forces on the ridge with skirmishers deployed.


Baron Larrey and his ambulance unit make preparations.
Beth served in the US Navy as a medical corpsman and loves to field this set of figures.

A view of Beth's Italian division.
As I said they served as Frenchmen that day. Historically, the Italians were on a par with the French for the most part.
The troops of the Kingdom of Naples... somewhat less so. A LOT less so.

French light cavalry advances in the centre, passing the Sand pit and the farm of La Haye Faux and their cattle.
"Biftake tonight, boys!"

The heavy cavalry - Cuirassiers and lancers - follow up.
The Imperial Command including Boney (we're on a first name basis since we're "buds" and I painted him),
a marshal, a topographical engineer, a bodyguard from the Old Guard grenadiers, the Guard Chasseur a Cheval,
and the Horse Grenadiers.

Prussian regulars advance singing "Ein' Feste Burg ist unser Gott."
I realised that I hadn't painted any Prussian generals so General Andrew Jackson (the red-head on the horse)
 was detailed to lead The Boys from Berlin for the day, including a battalion of the Guards.
The small green die indicates one casualty on the unit. A side-ways stand denotes the unit is "shaken."

The Duke of Wellington hangs out under the tree and has the Big Green Die indicating turn behind him.

The Italians have taken some casualties, indicated by the small white rings.

The French light cavalry hit home. They hurt some of the British units, but were thrown back
... if memory serves.
Beth and Bear battled it out on the Allied left. Andy began an end run around a small woods held by the Rifles of the 95th of Foot on the Allied right. Martin kept trying to soften up the middle to send the Guard in. My Dutch-Belgians - all "second-rate" troops - took an occasional cannon ball but were left alone. I was surprised, to tell the truth.


The French advance.
It's pictures like this that explain why Napoleonics/Horse-&-Musket games are my favourite.
(Figures by various manufacturers.)

The Highland Light Infantry stand ready to receive. (Essex Miniatures with a Minifig gun crew)

The columns go forward while the Highlanders get ready for the assault.
Andy completed his end run and engaged the British light dragoons with his hussars and dragoons while his infantry smashed through the British Troops on the ridge. In Shako, attack columns cannot fire - only lines can - but columns can attack lines at a 3:1 advantage in hand-to-hand fighting, that is three battalions in column can attack one battalion in line. If one battalion is staggered by the line's fire the two others can still come on. At about this point, both Kevin and Andy cursed their dice and might set up a small auto-da-fé to punish the guilty and encourage the wavering.  Martin brought up the Guard, including the Marine de la Garde battalion and threw back rest of the defenders on the ridge. Wellington may have been captured; things got awfully confused at this point.

I pushed my Dutch-Belgians off the ridge to try to take some of the pressure off the British. I attacked an Italian horse battery with my Hanoverian hussars and got them thrown back by the close canister of the battery defending itself. I charged an Italian line battalion with Belgian light dragoons (rated 2nd Rate.) The infantry attempted to form hasty square... and FAILED! Now was my big chance! The infantry couldn't fire, but did fight with their full Morale Rating. So I charged... and was annihilated by the Italians! Soon after that, time was up and we called it a French victory. The position on the hill was pierced and the French columns were last seen headed for the waffle stands of Brussels. The Prussian were kept in check by the Italian and could not assist the defenders of the ridge. They each probably retired for stollen and cannoli respectively. The Dutch-Belgians had a good seat to watch the goings-on. It was not an easy game and neither side had a "walk-over."

I was not pleased with myself and my lack of organisation and planning for the game - a consistent fault of mine. (I even lost my temper at one point and had to visit the street outside the library for a breath of air, as it were.) Still the players appeared to enjoy it... and that's what really counts. As Bear reminded me and Andy had said before, any day you get to play is a good day.

Many of you reading this might have played larger games based on Waterloo and some of you might even have gone to the reenactment in Belgium. We just did what we could.

The French heavy/shock cavalry continue to take casualties, but they can take it.

Prussian reserve infantry battalions battle the Italian units hand to hand on the left.
On the right, the Dutch-Belgian light dragoons make their death ride into a unit that couldn't make hasty square.

The Guard begins its assault on the ridge.

I just got a new camera and we tried using the flash to see how it looked.
This is how it looked.

The Highland units had evaporated and the ridge is open on the right of the British position.

End game over-view. The French are all over the ridge. The Italians are in a fairly even fight with the Prussians.
The Dutch-Belgians are twiddling their thumbs.

Another view of the Guard's assault on the ridge. The Marine de la Garde are facing off with a British line battalion.
The brave heavy gun of the Royal Artillery continues to spit defiance.

The Marylanders of the Dutch-Belgian contingent.

Italian light horse, dragoons, artillery, and command, including Eugene and his pals.

Italian line infantry and skirmishers.
I'm including these because my wife does ther own painting for the most part. (I fill in with the weird and the special.)

Prussian line and reserve infantry and skirmishers
A division in column.
The valiant defenders of the ridge.
Andy's end run with his cavalry.


"When in doubt, consult the rules."

Bear's Prussians formed square at one point to head off an Italian cavalry charge.

That cavalry charge, in fact.

The British light dragoons having been thrown back, it doesn't look promising for the Allies.